How to Find Ticks on Long-Haired Dogs With Manual Checks
Practical guidance for how to find ticks on long haired dogs: visual clues, a step-by-step manual check, and when to seek veterinary confirmation.
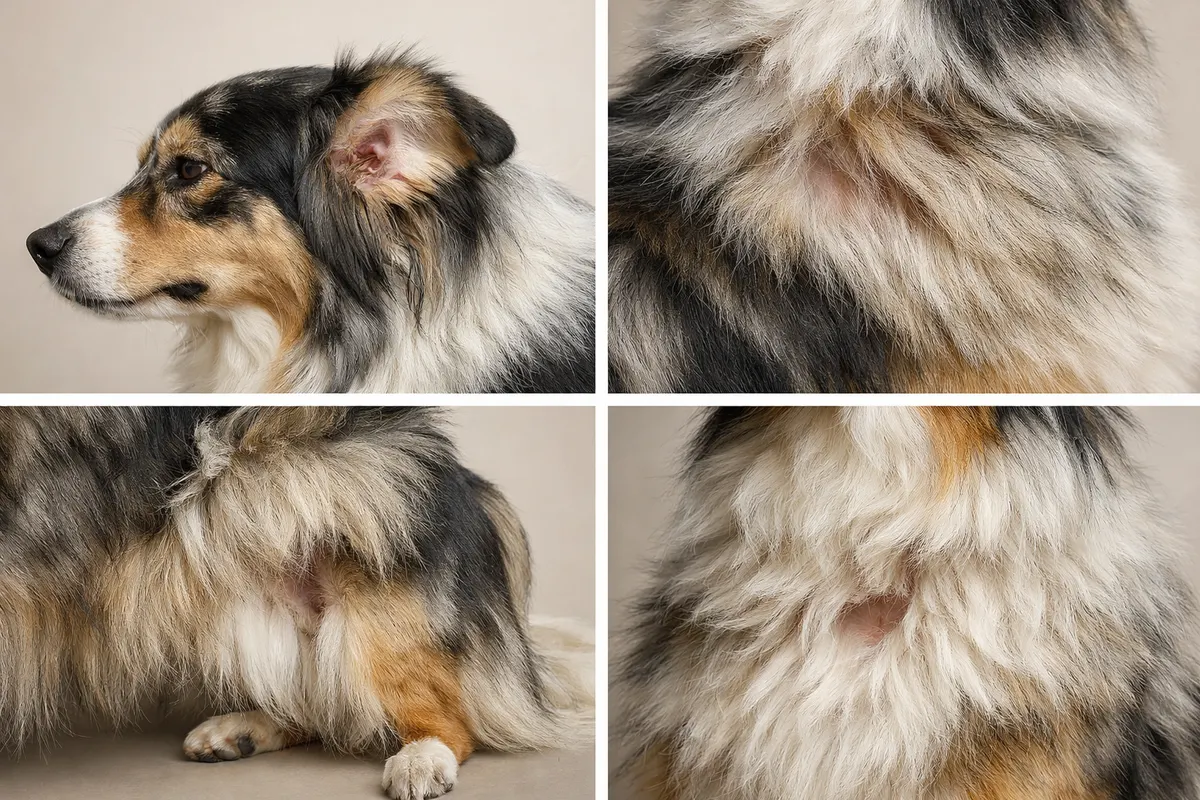
Quick answer: finding ticks on long-haired dogs
If you’re wondering how to find ticks on long haired dogs, start with a calm, close inspection of the coat where ticks like to hide: around the ears, under collars, between toes, in armpits and groin folds, and along the back where long fur parts. Part the hair with fingers and use good light; a hand-held magnifier or phone camera can help you inspect a small object, but a dark dot or rounded bump alone is not enough to identify a tick.
Ticks are often easier to feel than to see on long-haired breeds. A slow, methodical stroke of the coat toward the skin may reveal a bump that needs a closer look. Do not squeeze, prod or pull it to test what it is. If you find a suspicious spot, note its size, shape, whether it looks engorged, if it has legs visible at the edges, and whether it appears attached to the skin—these clues guide your next steps.
When in doubt, document the finding with a few clear close-up photos and contact your veterinarian promptly if you cannot confidently tell whether the spot is a tick. Photos alone can’t rule out tick-borne disease or identify life stage perfectly, but they help you and your veterinarian decide whether removal, testing, or monitoring is appropriate.
If you can clearly identify an attached tick, remove it promptly using an appropriate method or obtain veterinary help. Do not delay removal while waiting for a photograph, app result or species name. If your dog is weak, unsteady or having trouble breathing, seek emergency veterinary care.
What it means to check a long-haired dog for ticks
Long-haired dogs present two inspection challenges: dense or long guard hairs obscure small arthropods, and loose debris or skin growths can look similar to attached ticks. In practice, checking a long-haired dog means shifting from a quick surface scan to parting the fur, working in panels, and feeling the skin. The goal is to reliably separate mobile or attached arthropods from inert lumps, dried scabs, or plant material.
A 'positive' manual finding can mean several things: a visible attached tick (mouthparts embedded), a probable tick (rounded body with tiny legs visible), a crawling tick (moving dot on the surface), or a non-tick lookalike such as a wart, scab, flea dirt, or seed burr. Each has different implications for removal and veterinary care, so being precise about what you see matters.
Checking also involves context: recent walks through tall grass or wooded areas increase the chance the dot is a tick, while a long-standing bump may be a skin lesion that also needs assessment; its history does not prove that it is benign. Recording the location on the body and any recent exposure helps you and your veterinarian decide how urgently to act.
Key visual and tactile clues to distinguish ticks
Use these clues together—no single clue is definitive. The strongest signs of a tick are body shape, legs, attachment point, and recent mobility. Pay close attention to how the object interacts with the skin and hair when you part the coat or gently stroke the area.
Inspect with good light and magnification without compressing or disturbing the object. Look for a separate body and legs, but remember that fur can hide them. An unseen feature is missing evidence, not proof that it is absent. Do not try to make an attached object move.
- Body shape: an attached tick may be flat or swollen, but a rounded shape by itself is nonspecific.
- Legs: larvae have six legs; nymphs and adults have eight. Six legs does not rule out a tick. The CDC illustrates the stages at https://www.cdc.gov/ticks/about/tick-lifecycles.html.
- Attachment: tick mouthparts attach to the skin while most of the body remains outside; do not dig into a bump looking for a whole hidden tick.
- Movement: a crawling tick can be loose in the coat. Being unattached does not mean an object is harmless debris.
- Color: ticks can be plain or patterned, and feeding can change their appearance. Color alone is unreliable.
- Location: examine the whole dog, including the ears, collar area, armpits, groin, tail and toes. Do not restrict the search to one favorite site.
- Size: record a measurement if practical, but do not assign life stage or attachment duration from size alone.
- Behavior: scratching or licking can draw attention to irritation, but a quiet dog can still carry ticks.
Step-by-step manual check for long-haired dogs
Prepare: choose a bright, calm area and have two helpers if the dog is fidgety—one to reassure the dog and one to help part hair and hold a camera or magnifier. Wear disposable gloves for tick removal and avoid handling ticks with bare fingers. Gather a flashlight or phone light, a magnifying lens, fine-tipped tweezers or a proper tick removal tool, alcohol in a small container, and your phone for close-up photos.
Systematic paneling: work in sections. Start at the head and ears, then move to the neck and collar area, chest, under the front legs, along the belly, groin, inner thighs, back legs, feet and between toes, and finish at the hind end and tail base. Part the coat with flat fingers close to the skin rather than lifting hair from afar—this reveals the skin surface and any small rounded bodies.
How to inspect each panel: press fingertips flat against the skin and move slowly across the panel, feeling for small, firm bumps. When you find a bump, use your free hand to push the surrounding fur aside so you can see the base. If possible, take a close-up photo from different angles (front, side, back lighting) to reveal legs and attachment. A loose object may be debris or a crawling tick. Look carefully rather than brushing it away and assuming the check is complete.
For a clearly identified attached tick, use fine-tipped tweezers to grasp it close to the skin and pull with steady, even pressure without jerking or twisting. Avoid squeezing its body. If using a dedicated tick-removal device, follow that device’s instructions, which may differ. If the dog cannot stay still or the site is difficult to reach safely, contact a veterinarian for prompt assistance. Do not pull an unidentified skin bump.
After removal, clean the area with a pet-safe method recommended by your veterinarian and wash your hands. Ask the clinic how to store a specimen if identification is useful. Record the date and where it was found; unless you witnessed attachment, do not write an exact duration as fact. Continue checking the rest of the coat because finding one tick does not exclude others.
VCA advises using tweezers or a commercial removal device and avoiding petroleum jelly, nail polish and heat: https://vcahospitals.com/resources/preventive-dog/parasites/true-or-false-can-you-take-a-tick-off-pets-with-petroleum-jelly-or-nail-polish. Keep the dog’s comfort and your ability to see the attachment point central to the decision about getting help.
- Do not crush ticks with your fingers or squeeze an attached tick’s body.
- Do not apply petroleum jelly, nail polish, heat or household chemicals to try to make a tick detach.
- Seek veterinary advice if the dog develops lethargy, lameness, appetite changes or other illness; weakness or breathing difficulty warrants urgent care.
Illustrative situations during a coat check
These are hypothetical situations, not documented app scans or diagnostic reference cases. They show how the next action changes with the evidence available. Do not compare a real bump only with a written example and assume that the label transfers to your dog.
Example 1 — Tiny object behind the ear: Parting the fur reveals a small dark body with visible legs. Do not prod it. If it is clearly a tick attached to the skin and you can remove it safely, act promptly. Its small size does not establish that it is a nymph; seek help if you cannot distinguish the attachment from surrounding tissue.
Example 2 — Rounded body under the collar: A swollen object has visible legs close to the skin. Its shape supports a tick identification but does not tell you its species, exact feeding duration or whether it carries pathogens. Remove a confirmed tick promptly using the appropriate method, then record the finding and ask your vet about follow-up.
Example 3 — Crust or skin bump on the flank: You cannot see a separate body or legs. Do not rub, soak, scrape or pull it as an identification test. Take a clear picture if that is easy, note its location, and obtain veterinary advice if you cannot tell what it is. An app should not label it safe simply because legs are absent from the photograph.
Example 4 — Plant material in the coat: A clearly recognizable burr is caught in loose hair without attachment to the skin. Gentle grooming may remove loose material, but stop if it is embedded, painful or near a sensitive site. Finding a burr does not replace the remaining tick check. Never pull blindly between the toes or into an ear.
Limitations
Manual checks and photos are powerful first steps but have clear limits. A photo cannot rule out tick-borne disease, determine how long a tick has been attached with perfect accuracy, or guarantee that mouthparts were removed completely. Small nymphs are particularly hard to detect in dense fur and can be mistaken for skin pigmentation or debris in photos.
A clear view of a distinct body, legs and attachment can support recognizing a tick. A rounded dot, a hidden attachment point or a longstanding bump remains uncertain. Photographs also cannot confirm that the rest of the coat is free of ticks. If the finding is unclear, ask a veterinarian rather than testing it by squeezing or tugging.
Seek veterinary help if you cannot safely remove a confirmed tick, if the dog is unwell, or if the skin becomes painful, swollen or increasingly irritated. Do not dig into the skin for suspected retained mouthparts. Ask the veterinarian whether a saved specimen would be useful and how it should be packaged; do not let specimen collection delay care.
Prevention remains a separate daily routine. The CDC recommends checking pets for ticks daily, especially after outdoor activity, and discussing appropriate prevention with a veterinarian: https://www.cdc.gov/ticks/prevention/preventing-ticks-on-pets.html. A product suitable for one pet may not be safe for another, so follow the prescribed product and label rather than sharing treatments between animals.
- Clear attached tick: remove promptly using an appropriate method or get veterinary help.
- Uncertain object: avoid pulling or squeezing; arrange a closer assessment.
- Illness or concerning changes: contact your veterinarian regardless of an app result.
Related guides
Use a guided workflow for dog tick checks
Use the Dog Tick Check at https://tick-detector.app/tools/dog-tick-detector as a supplementary photo-based aid for an uncertain finding. It cannot diagnose illness or prove the dog is tick-free. Remove a confirmed attached tick promptly or seek veterinary help; do not wait for an app response.

Frequently asked questions
How often should I check my long-haired dog for ticks?
Check your dog daily, especially after being outdoors. Part long fur to inspect the skin, covering the whole body rather than only the easiest areas. Combine checks with veterinarian-recommended prevention; a weekly check or a quick pass over the topcoat can miss attached ticks.
Can I tell the tick species from a photo?
Photos can sometimes indicate size and general shape, which helps narrow possibilities, but species-level identification from a single photo is often unreliable—especially for tiny nymphs or partially obscured specimens. A clear close-up showing dorsal patterns, mouthparts, and leg placement can help an expert, but laboratory or veterinary identification remains the most reliable method when species matters for treatment or testing decisions.
What if I find a bump that won’t come off—could that be a tick stuck under the skin?
Do not pull a bump unless you have identified a tick. Ticks attach with their mouthparts while the body remains mostly outside the skin. A bump may instead be a nipple, skin tag, scab or another lesion. Do not dig or cut into it; ask a veterinarian to assess an uncertain finding or suspected retained mouthparts.
Is it safe to remove a suspected tick myself on a long-haired dog?
A clearly visible attached tick can often be removed with fine-tipped tweezers, grasped near the skin and pulled with steady pressure without twisting. Follow the manufacturer’s instructions for a dedicated removal device. If the dog cannot stay still, the tick is near an eye or inside an ear, or you cannot identify the attachment safely, obtain veterinary help promptly.