
How to Remove a Tick from a Dog: Tools and Safe Steps
Learn how to remove a tick from a dog using fine-tipped tweezers or a purpose-made hook, follow the correct tool technique, and know when to contact a vet.
Quick, safe answer: how to remove a tick from a dog
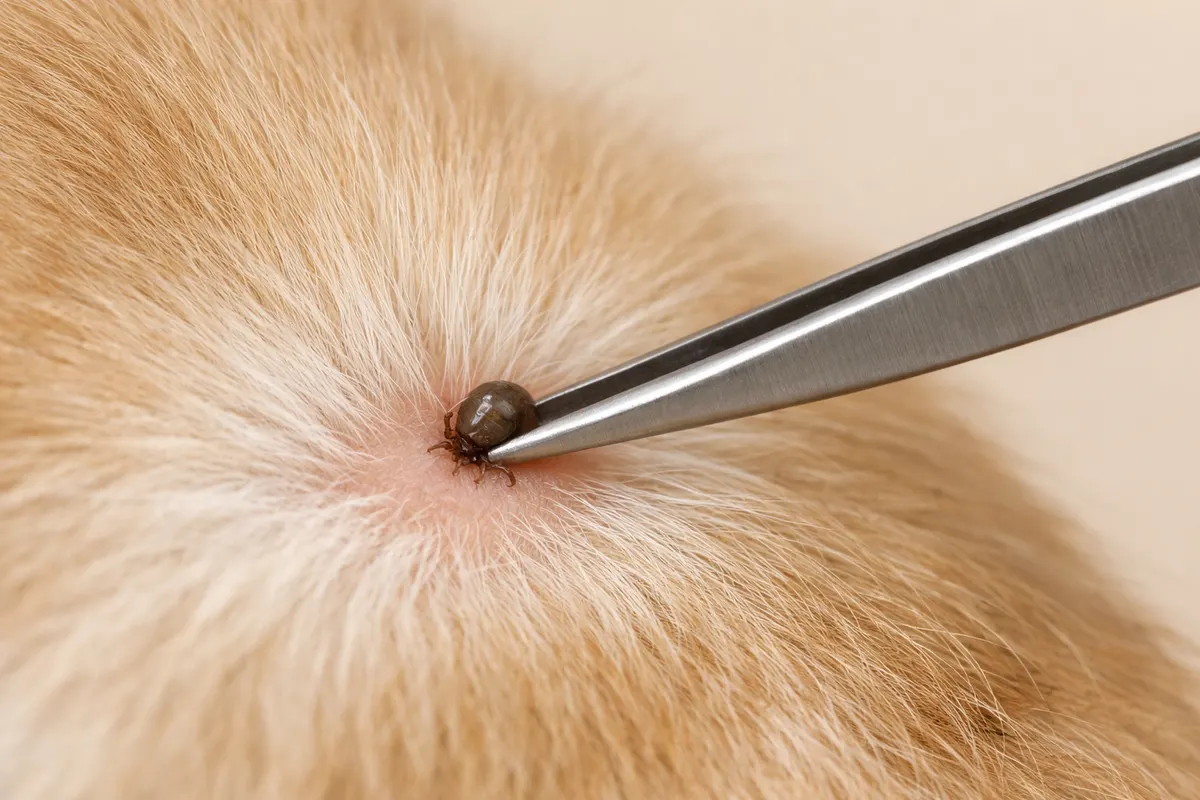
If you find an attached tick on your dog, remove it promptly using either fine-tipped tweezers or a purpose-made rotating tick hook (Tick Twister). With tweezers, grasp the tick as close to the dog’s skin at the mouthparts as you can, apply steady straight upward pressure, and lift steadily — do not squeeze the tick’s body. If you use a rotating hook, follow the tool manufacturer’s instructions or the rotational method described by the PDSA; many hook tools remove the tick by rotating, not by an upward yank. PDSA guidance on tick-twister technique (https://www.pdsa.org.uk/pet-help-and-advice/pet-health-hub/conditions/how-to-remove-a-tick-from-a-dog-or-cat) explains the rotation method in detail.
After removal, clean the bite site gently with soap and water or a recommended skin cleanser and monitor the area for redness, swelling, or discharge. Avoid home remedies such as applying heat, oil, alcohol, or attempting to squeeze or crush the tick while it is attached; these actions can increase irritation and risk of retained mouthparts. If you’re unsure whether the mouthparts were removed, or if the site becomes painful, swollen, or if your dog shows signs of illness, contact your veterinarian promptly.
If you want to document the finding and check the rest of your dog, use a manual seven-area dog-check checklist such as our Dog Tick Check: Free Guided Checklist at https://tick-detector.app/tools/dog-tick-detector. That checklist guides a manual inspection of seven body areas; it does not diagnose and does not record or save medical records on your behalf.
AI-generated illustration of the tweezers approach. Follow the written technique and the instructions for your exact removal tool.
- Tools: fine-tipped tweezers or a purpose-made rotating tick hook (Tick Twister).
- Tweezers technique: grasp at mouthparts, steady straight upward pull, do not twist.
- Rotating hooks: follow manufacturer or PDSA rotation instructions; many hooks remove ticks by turning, not yanking. PDSA guidance (https://www.pdsa.org.uk/pet-help-and-advice/pet-health-hub/conditions/how-to-remove-a-tick-from-a-dog-or-cat).
- Do not use heat, oil, alcohol, or squeeze the tick’s body while attached.
- Clean the site gently and watch for signs that require veterinary care.
What a tick attachment looks like and why removal matters
A tick attached to a dog is the parasite’s mouthparts embedded in the skin while the body swells as it feeds. Visible clues can include a dark spot with legs at the edge, a pale or engorged oval body depending on how long the tick has fed, and a small raised area of skin with a central black dot. Exact appearance varies by tick species and life stage; larval, nymph, and adult ticks can look different in size and color, and ticks commonly found on dogs may be small and easy to miss in dense fur.
Removing an attached tick is about reducing local irritation and lowering the chance of pathogen transfer; removal itself does not guarantee prevention of disease because transmission risk depends on the tick species and how long it fed. Visual inspection and removal are the right immediate actions for a pet owner; any later questions about disease risk or treatment belong with your veterinarian, who can advise based on your region, tick species, and the dog’s symptoms. For background on tick-borne disease risks and tick biology, see resources from the CDC and veterinary organizations such as the AVMA and PDSA: CDC ticks resource (https://www.cdc.gov/ticks/), AVMA ticks (https://assets.ctfassets.net/rt5zmd3ipxai/5VWsGidwCJfNiHK5Ev1PoZ/712abd96bdc19df838df615b30f942fb/AVMA_parasites.pdf), PDSA tick removal guidance (https://www.pdsa.org.uk/pet-help-and-advice/pet-health-hub/conditions/how-to-remove-a-tick-from-a-dog-or-cat).
When a photo or quick look is used to decide if something is a tick, remember photographs alone often do not prove species, feeding duration, or whether the mouthparts are fully removed — those require closer inspection or veterinary assessment. This article focuses on safe removal and immediate aftercare; for recognition details such as distinguishing an engorged tick from a skin tag or scab, consult a specialist recognition page or a veterinarian.
- Ticks vary by life stage: larvae (tiny), nymphs (small), adults (larger).
- An attached tick’s mouthparts are embedded; the visible body can be dark, brown, or pale when engorged.
- Removal lowers irritation and potential transmission but does not eliminate all risk of tick-borne infection. See CDC and AVMA links for regional disease context.
Key clues to confirm an attached tick on a dog
Before removal, do a quick check so you know what you are dealing with and can choose the right tool and approach. Look for a firm attachment point where a small arachnid with visible legs meets the skin. Part the fur and examine the skin closely: a tick will often show legs at the edge of a rounded body and a tiny mouthpart area at the center near the skin.
Compare body shape and leg count to common lookalikes. Ticks are arachnids and have eight legs in nymph and adult stages (six in larval stage), while fleas and beetle larvae do not share that leg arrangement. A skin tag or wart will not show legs or a distinct mouthpart; a scab or embedded seed will not have jointed legs. Do not tug a suspected attachment to test it; inspect closely and ask a vet if you cannot distinguish it from skin or a scab.
If you have doubts after a close visual check, take careful close-up photos for your records and to show your veterinarian. Avoid digging into the site to reveal the mouthparts. If the area is inflamed, painful, or if your dog acts unwell, skip home removal and contact your vet for safe removal and advice.
- Visible legs at the edge and a distinct mouthpart are strong clues of a tick attachment.
- Adults and nymphs have eight legs; larvae have six, so leg count alone does not distinguish every stage from insects.
- Skin tags, scabs, and embedded debris usually lack legs and jointed mouthparts; treat these as different problems. Do not probe the site to check.
Step-by-step workflow
Choose the right tool before you begin. Two widely accepted options are fine-tipped tweezers and rotating tick hooks (Tick Twister style). Fine-tipped tweezers give a direct grip at the mouthparts and are suitable for most owners; purpose-made rotating hooks are designed to ease removal for small or difficult-to-reach ticks. Whichever tool you pick, read and follow the tool manufacturer’s instructions; if the tool’s instructions differ from a general step below, follow the tool.
Fine-tipped tweezers method: part the fur, place the tweezers so they grasp the tick as close to the dog’s skin at the mouthparts as possible (not the swollen body), and pull with steady, even, straight upward pressure until the tick releases. Do not twist the tweezers, do not jerk, and avoid squeezing the tick’s abdomen. The goal is to remove the mouthparts intact and avoid crushing the tick.
Rotating hook method: align the hook so the tick sits in the fork, then follow the manufacturer’s or PDSA’s rotation instructions to release the tick from the skin. Many rotating hooks rely on a slow turning motion to release the tick without upward yanking; follow the tool’s instructions exactly because not every hook uses the same motion. PDSA explains the Tick Twister rotation method and when rotation is recommended (https://www.pdsa.org.uk/pet-help-and-advice/pet-health-hub/conditions/how-to-remove-a-tick-from-a-dog-or-cat).
Aftercare: once removed, do not burn or apply oil/alcohol to the bite during removal, and do not squeeze the tick’s body. Clean the bite site gently with soap and water or a veterinarian-recommended cleanser and dry. Avoid giving antiseptic doses or medication without veterinary advice; instead, monitor the site and your dog over the following weeks, following your veterinarian’s advice. If the removal left visible mouthparts in the skin, do not dig or pick at them; contact your veterinarian for removal options. Seek prompt veterinary care if the site becomes painful, shows spreading redness, produces discharge, or if your dog develops fever, lethargy, lameness, or other signs of illness.
- Prepare: have tweezers or a rotating tick hook, gloves, a veterinarian-recommended cleanser, and a sealable container for the tick.
- Tweezers: grasp close to skin at mouthparts, steady straight upward pull, no twist, no squeezing.
- Rotating hook: use the tool’s specified rotation method; many hooks remove by turning rather than pulling. See PDSA for an example of rotation technique. PDSA (https://www.pdsa.org.uk/pet-help-and-advice/pet-health-hub/conditions/how-to-remove-a-tick-from-a-dog-or-cat).
- Aftercare: clean gently, monitor the site, do not apply home remedies like burning or oils, and contact your vet for signs of infection or illness.
Examples
Scenario — small tick on the ear margin: Ears can hide small nymphs. If you can see mouthparts and the tick is accessible, use fine-tipped tweezers to grasp at the mouthparts and pull straight out. If the tick sits in a creased area and a rotating hook is provided with guidance to twist out, using that tool per its instructions can be easier in tight spots. If you cannot get a clear grip, or if the dog resists strongly, contact your veterinarian for removal.
Scenario — engorged tick near the groin in dense fur: Engorged ticks may be larger and more difficult to access. Part the fur gently and choose a tool that lets you get closest to the mouthparts. If you can only reach the tick’s body and not the mouthparts, seek veterinary removal to reduce risk of leaving mouthparts behind. Hypothetical cases are only examples to show technique differences; follow tool instructions for your chosen device.
Scenario — suspect lookalike: if the spot might be a scab, skin tag, or wart rather than a tick, do not try to remove it as a tick. Photograph the area, avoid probing, and ask your veterinarian or an identification resource to confirm. Recognition and diagnosis are separate from removal — consult the dedicated recognition guidance if you need help telling an engorged tick from other skin changes.
- Ear margin: usually accessible; tweezers work well. If using a hook in tight folds, follow the hook’s rotation instructions.
- Engorged tick in dense fur: prioritize visibility at mouthparts; seek vet support if you cannot access the mouthparts.
- Suspected lookalike: photograph and consult a vet rather than force removal.
Limitations
Removal reduces local irritation and can reduce the chance of pathogen transfer, but it does not by itself rule out infection. Transmission of tick-borne pathogens depends on the tick species and the duration of feeding; in many cases, early removal lowers risk but does not eliminate it. Do not rely on visual appearance alone to estimate feeding time or infection risk.
Some tools and techniques are not universal: fine-tipped tweezers require a straight upward pull at the mouthparts and specifically advise against twisting; rotating hooks rely on a manufacturer- or PDSA-specified rotation motion instead of an upward yank. Follow the instructions for the exact tool you own and consult your veterinarian if you are unsure which method your tool uses. Never use burning, smothering with oils or alcohol, squeezing the tick’s abdomen, or digging for retained mouthparts—these can cause more harm and are not recommended by veterinary authorities.
When to contact a veterinarian: prompt contact is appropriate if you cannot remove the tick without crushing it or leaving mouthparts behind, if the bite site becomes painful or swollen, if the dog shows fever, lameness, reduced appetite, or behavioral changes, or if you are uncertain about the tick species or local disease risks. For identification and recognition topics (for example, distinguishing an engorged tick from a skin tag or scab), consult specialized recognition resources or a veterinarian; recognition questions are handled separately from removal and aftercare guidance.
- Removal lowers irritation and may lower pathogen transfer risk, but does not guarantee prevention of tick-borne disease.
- Follow the exact technique required by your chosen tool: tweezers = grasp mouthparts + straight pull; rotating hooks = follow manufacturer/PDSA rotation. PDSA rotation guidance (https://www.pdsa.org.uk/pet-help-and-advice/pet-health-hub/conditions/how-to-remove-a-tick-from-a-dog-or-cat).
- Do not use burning, oil, alcohol, squeezing, or digging; contact a vet for retained mouthparts or signs of illness.
Related guides
Check the rest of your dog
Use the seven-area Dog Tick Check checklist (https://tick-detector.app/tools/dog-tick-detector) to guide a manual inspection after removal. It does not analyze a photograph, diagnose disease, or save a medical record. Contact your veterinarian for difficult removal, a worsening bite site, or signs of illness.
Take the next step →Frequently asked questions
Can I use tweezers to remove any tick on my dog?
Fine-tipped tweezers are a safe and common choice when you can see and reach the tick’s mouthparts. Grasp the tick as close to the skin at the mouthparts as possible and pull with steady, straight upward pressure. Do not squeeze the tick’s body. If the tick is in a tight fold or hard-to-reach place and a rotating hook or Tick Twister is available, follow the tool’s instructions instead of forcing tweezers into an awkward angle.
Is it ever OK to burn, smother, or squeeze a tick to remove it?
No. Do not burn the tick, apply oil, alcohol, or other substances to try to make it back out, and do not squeeze the tick’s abdomen while it is attached. These methods can increase irritation, make removal harder, and raise the chance that mouthparts are left behind. Use a proper removal tool and technique and seek veterinary help if you cannot remove the tick safely.
What should I do with the tick after removal?
Place the removed tick in a sealed container or bag if you want to keep it for identification or veterinary inspection, and note the date and where on the dog you found it. Treat any photo-based identification as tentative; your veterinarian can advise whether identification or further assessment is useful. Whether to keep the tick depends on local veterinary advice and the dog’s symptoms—keeping the specimen is optional and not required for routine removal.
When should I contact my veterinarian after removing a tick?
Contact your veterinarian if you cannot remove the tick without crushing it or leaving mouthparts behind, if the bite site becomes painful, swollen, or shows discharge, or if your dog develops systemic signs such as fever, lethargy, lameness, loss of appetite, or behavioral change. Also consult your vet if you are unsure whether the removed item was a tick or if you need guidance about local tick-borne disease risk.